Welcome to MY STUFF ROOM - a space for my collection of STUFF ... STUFF GALORE ... GALORE-IOUS STUFF! ... INSPIRING STUFF I find online, and maybe even some STUFF I create myself. It's all Stuff that makes for a Creatively Galore-ious Day! ... Thanks to all who share their talents! I love to see it ... it truly inspires.

Showing posts with label Paint. Show all posts

Thursday, June 12, 2014

An Old Bike RePurposed


This was a cute little bike we got for our oldest son many years ago. 


It was used and worn when we purchased it ..., then it got more love and use and has been kicking around (not used) for the past too many years. 


I have been wanting to do something with it for awhile and decided it would be the perfect addition to our party décor since we had used this quote in our daughters graduation announcements.


FYI -  The "LIFE IS LIKE RIDING A BICYCLE" quote has been used in a previous post (HERE) ..., and something similar or complementary to it (HERE).


So after a can of spray paint this became it's new look.


Everything got sprayed except the handles.  It was a quick spray job since we were out of time, and we ran out of paint too soon too so there are places that could have used a little more.  Luckily it's a vintage look we are going for, so the look fits just fine.  

The paint we used was Valspar, Gloss Exotic Sea. 


For our party it's home was atop a shelf at the front entrance of our party tent.  It's new home will be ... somewhere in our yard ... when I find just the right place. 


Saturday, February 15, 2014

Painting Leather

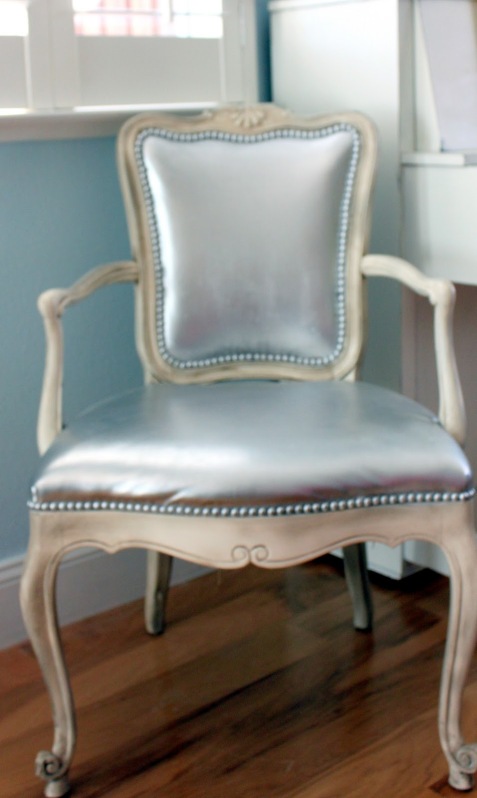
Did you know you can paint leather?  It really clever huh!  Redoux has a post about it and shows a lovely chair she painted silver.  The silver surprised me, but it's a good look.

Here is her before and after looks ...


Saturday, January 25, 2014

A Blue Piano and Bird Cages and a Lacey Backdrop

This piano looks awesome in blue


I saw this blue piano at Kara's
 
and there was more fun to look at too ...


Isn't it a lovely look!
What lovely combination of high chair, lace, birdcages, and color.


Saturday, November 23, 2013

Gold and Glitter, Flowers and Leaves


We have enjoyed seeing the beautiful colors of the leaves in Seattle this fall, but they are almost gone. 

Shimmering glittery gold or silver, bronze and copper look lovely on these leaves (pinned here).
DIY this glittery leaf garland for fall.
A lovely look for fall.

--

I saw this shiny bouquet(and pinned it) and wondered what it really would look like ..., it could be beautiful for fall or winter. 
Just spray baby's-breath gold or silver.

Curious - Spray paint baby's breath gold & silver for decorations- engagement party, bridal shower, or weddings.
Lovely!


Tuesday, September 17, 2013

Chalk Paint

Yesterday's post was about my search for Chalk Paint / Milk Paint, because I really wanted to used that type of paint on some of my furniture. 
It was a lengthy, but hopefully informative post - a lot of reading - which is good if you are looking for info about those types of paint. 
If however, you are just wanting to see something painted with chalk paint, this post might be a better post for you, since it has a few more photos with their paint colors listed.
 
 
Here is my collection of furniture that I painted using chalk paint - my own mix, as instructed in the sites I mention in my previous post.
 
I guess I'll start with the first piece I painted and then follow with each piece I painted in the order I painted them.
 
FIRST -
I think this is my very favorite piece, among the six pieces I refinished. It turned out just as I had hoped it would.  It was the perfect piece to start with, and it inspired me to continue.
 
My Pie Safe,
that used to reside in my kitchen, looking something like this -
 
 
(I wish I had taken a better photo of it before I moved it out of it's place in the kitchen, but  I was so enthused to begin that painting project that I neglected to take a photo of it, so this was what I could quickly find in my photo files.)
 
Now rests in our main bath looking like this -


And we call it our towel cupboard now.
WE REALLY LOVE IT!
 
 
About it:
Paint color is Valspar Gentle Wave / Satin gloss,
mixed up as chalk paint, using unsanded grout.
 
I did not sand the cupboard before I began, but I did wash it down with a wet cloth, and let it dry.
I then began to paint -
 
This was the first chalk paint mix I did and it was really interesting. 
It started thickening so fast that I had to add more and more paint and water.  I don't know what I did wrong, or if I did anything wrong, but it just kept getting thicker, so that it was almost difficult to stir. Strange thing!  It finally seemed to be a good consistency, but it began to get gritty, and that wouldn't work out with stirring, and I wasn't willing to put it in my blender.  I wasn't going to toss it out either, so I decide to use it as it was. 
 
I wasn't really careful about the direction I painted in some places,
it kinda gobbed up in some of the corners, making a bit tricky to work with,
 it seemed to have a sandpaper grittiness look when it was wet, and that same sandpaper grittiness to the feel when it dried. 
 
It was odd paint to work with, and it worried me a bit, but it seemed to be the right color and look we were hoping for, and it was covering the wood nicely, so I just kept going with a hope that it would turn out better than I thought.
 
After it dried I sanded it, and the grittiness came right off with little effort.  I was sanding it all anyway, so it wasn't a problem.   I distressed it in places, sanding a bit harder and longer, until I felt like I liked the look. 
I didn't want too much wood showing thru on the outside parts of the cupboard, though some of the inside parts are quite distressed. There were a couple placed that the paint peeled right off, even too much, so I just painted over that, let it dry, and sanded it again.  It was great!
 
(These next photos aren't very true to color)
 
 
I painted the inside of the drawers with a bit of a dry brush and liked that worn look inside. I sanded them, but not much (it's just too hard to get into those tiny areas with much force or movement).


After sanding, I wiped it clean again and began to wax it, using Fiddes and Sons Supreme Wax Polish, in a Light color tone, purchased from Amazon. 
I chose this brand of wax because of the info I had heard from Miss Mustard Seed
 
I waxed it and let it sit all night and buffed it in the morning and was so very pleased with the look. 
It looked aged like I had hoped it would.
 
 
We sprayed the wire mesh white, instead of the black that it was,
 and put it back on the doors using the staple gun, and replaced the doors using the same hinges that were on it before.
 
We did not use the same wooden pull knobs that it originally had, but instead replaced them with some cute and colorful ceramic knobs from Hobby Lobby.
(You might notice that the left door doesn't have a knob on it - that is because they only had four knobs at the time, so I'm going to have to get two more for the doors when they come in.)
 
One more bit of info -
The original look had a little piece of wood above the center of the two doors to turn down to hold the doors closed. I didn't want to put that back on either, so I left it off and have been thinking about purchasing some magnetic closers to hold them closed.  They don't seem to have too much of a problem staying closed enough on their own, so I am not going to worry about it unless it begins to bug us for some reason. (One of them is held open anyway.)
 
It is the perfect look for the exact place we were putting it, but I must say, I'd love to have it back in my kitchen in the condition it is in now.  It is lovely.
I don't know what I'm putting in the kitchen, in the place this came out of, but I do know that I'm not going to worry about that for several more months.  I'm sure I'll share with you when it happens.
 
 
SECOND -
The tall cupboard
that used to reside in my entrance hall,
looking something like this -
 
 
changing it's contents depending upon the season or the desire ...
 
 
Now rests in our main bath looking like this -


About it:
You might remember (if you saw this post) that I was having a hard time with how dark the inside of this cupboard was and how I wished it would show the items displayed in it better.  If you remember that, then you might wonder why I painted it a dark purple.  Well, I wondered too, but decided that the things being stored in it now do not need to be seen so much, just stored there.  So it actually works great for what we are using the cupboard for now.
I also think that the slight glossiness of the paint makes it easier to see into anyway. The place might make a difference as well. The lighting is much better in our bathroom than in the entrance hall, so it helps us see right into that cupboard.
 
For this piece of furniture I used Valspar Purple Valley in a Satin finish / mixed as chalk paint using unsanded grout. 
 
This time I used less grout and thought it spread nicely, but when it was all done I wondered if there wasn't enough grout mixed in because it didn't look as old and antiqued as the blue piece - it was so smooth.  I wasn't up for re-do, especially since it really was fine the way it was, so I left it.
 
I sanded and distressed it a bit, cleaned and waxed it (using the same light wax as the blue cupboard), and buffed it up nicely for a great look.  It's harder to see the distress because of the darkness of the colors.


We left the wire black, though I did spray a fresh coat of black paint on the mesh to help freshen it up a bit, placed the mesh back onto the doors, and put the doors back on with the same hinges that were on it before.  We purchased new handles for this piece too.
 
 
This cupboard also had little wood pieces to hold the doors closed, that I left off after painting. 
The magnetic closers will work great on these too, if I choose to use them later.
 
 
THIRD -
The wall shelf
that was above our toilet, looking somewhat like this -


Still rests above our toilet, looking like this -
 
 
I used the same paint as I did with the towel cupboard (seen above), and I love the look.  I kept the same hardware as it had previously.


This blue has to be our favorite color of all.
 
 
FOURTH -
The small mirror with floral pulls,
used to hide in a closet, with a honey oak finish - never used, and never before photographed ...,
now smiles on the wall in our main bath with that same lovely Gentle Wave blue, looking like this -


FIFTH -
The picture of the mother and child,
on the window wall, with a stained frame, once looking like this ...


Now looks like this ...
 

About this:
The paint color is Valspar Homestead Resort Jefferson White / Satin gloss, mixed as chalk paint using unsanded grout.
 
It was painted, distressed, waxed and buffed to create this look.
I first waxed it using Fiddes and Sons Supreme Wax Polish Light tone wax at the same time adding a bit of Rugger Brown tone, but the Rugger Brown tone was much too dark for what we wanted, so I painted over it again, distressed it again, and used only the light tone wax, and liked it much better.

It was obvious with this color, that the grout changed the color slightly.  It is a bit different than the trim, though it was the same paint color.  We thought it might change the color a bit, but we couldn't really tell with the colored paints.  Maybe it is because I mixed up such a small amount of this color.


SIXTH -
The thing -
phone stand or plant stand or whatever it is
- purchased from Goodwill with a distressed stained finish, looking somewhat like this ...
 
 
used to sit in the family room somewhat hidden behind another piece of furniture, waiting to find a place of it's own ....
 
which it now has ...
 
rests in the main bath looking like this -
 
 
About it:
It was purchased from Goodwill several months ago for four dollars.
The purpose of it's purchase was because ..., well, because it was only $4.00 and it is very sturdy, and I thought it would work nicely in some sort of wedding or other décor somewhere, sometime.
Yip!  It was one of those purchases - the kind of purchase that my husband says is "goin' broke saving money".
It was still a great purchase, don't you think?
 
By the way - if you know what this stand really was made for I'd love to hear about it.
 
The color is Valspar Del Coronado Coastal Peach / Satin finish, mixed as chalk paint using unsanded grout,
and it is our second favorite color in the collection we have here today. 
 
This chalk paint mix turned out perfect.  Everything was working great.
I painted, sanded and distressed, and waxed it with the light wax, and it is lovely.
 
 
SEVENTH, and LAST -
The only new piece of furniture purchased for this room is this small black
shelf
that used to look like this -


It now rests under the window looking like this -


About it:
It was purchased from Ross, in that glossy black, distressed finish.
We wanted more of the pink color in that room, so we painted it the same Coastal Peach chalk paint that we used on the little stand above.
We distressed it and waxed it with the light tone wax and buffed it to a lovely look.
 
We think that this little shelf looks much more cute in pink than it did in black.
 
We put a toilet paper holder on the side of the shelf, since it sits in front of the toilet, and we think that looks pretty good there too.  What a great toilet paper holder that little shelf makes!


I have learned that I do like chalk paint.
I will used it again ..., someday ..., somewhere ..., sometime!
 
 
This post has given a sneak peek at our main bath redo.  Stay tuned for the overall look of that redo - My Main Bath - Part 5 - Completed.


Monday, September 16, 2013

Chalk Paint / Milk Paint

I've been doing some searching about Milk Paint and Chalk Paint lately.

In my search for chalk paint and milk paint I found several sources that shared their DIY info, and found that they don't use the same ingredients (duh huh?). 


I love the idea that either paint gives an antique finish look and that it doesn't require sanding and prepping of the furniture.  I was determined to use it somewhere sometime.  I have heard (or read and seen) a lot about Annie Sloan Chalk Paint, but as much as I wanted to use it, I didn't want to pay the big bucks for it, especially when there are several simple recipes or homemade versions available.

So, I decided I'd make my own.


I am no scholar on these types of paints, or any paint for that matter, but I thought I would share what I learned, and a few of my favorite sources.


Lets begin with Chalk Paint
(since that is what I decided to use)

image from Rusted Gingham


Here are a few sources I found and compared:
 
My original favorite was The Design Pages, because she refers to Annie Sloan, and I have heard so much about that paint.

from The Design Pages:
Chalk paint can be applied to furniture and it is not necessary to sand or prime beforehand. It's a bit thicker than conventional paint and dries with a chalky finish that will usually require you to wax.

1. I used leftover paint - free
2. Unsanded Grout - $9.99 (you might want to buy a small bag:)
3. Stir stick, container and water - free

1. You will need 2 tbsp grout for every cup of paint. Mix the grout and water until they are blended together and there's no lumps.
2. Add the paint and stir. Many of the recipes I saw suggested using a food blender but I didn't and it wasn't lumpy at all.
I have used Annie Sloan in the past and I've always liked it but at $50 a pop I'm definitely sticking with my homemade version. It's hard to detect any change at all so I'm going to say it's worth the tiny effort to make some.

--- 
 
The Savvy City Farmer is a good site too, especially since it gives some substitute supply ideas and color adding hints.

from Savvy City Farmer:
Chalk is actually Calcium Carbonate and the product can be purchased in health food stores and at numerous on-line stores.  The cost is about $4.00 for 12 ounces.
Whiting powder will also give you a similar look for approximately $3.00 for a 1 pound package.
Plaster of Paris also works well and can be purchased at Michaels or Home Depot. Home Depot sells 3 pounds for approximately $6.00.

To get the chalk paint look just add ANY ONE of the above to your latex paint. The amount you use depends on how chalky you want the paint to look when dry.  I experimented using the sample size paints from Home Depot and used a ratio of 2/3 paint to 1/3 product.  You may need to add a few drops of water to the paint and occasionally stir it if it gets too thick.

I saved and washed out glass jars to mix the paint in.  I have used the paint over and over again and each time I just added a couple drops of water and stirred really good.

You can also create custom colors by adding acrylic craft paint to the latex and powder mixture.  Chalk paint is cheap to make and now you can have it in any color.
---
 
 There is more at Elizabeth and Co.

from Elizabeth and Co:
You do not have to measure precisely and here's an easy way to do it. Mark four equal lines on a clear plastic container. Add Plaster of Paris to reach the very first line. Then mix in about a tablespoon of water at a time until the Plaster of Paris is nice and smooth. You don't want any lumps. Then fill to the top line with paint and stir well. Super easy! I've found that if you don't mix the water into the Plaster of Paris first, the paint sometimes ends up gritty and no matter how much water you add at that point, you just can't get rid of the grit. And different brands of paint are thicker than others, so just adjust as needed. And just like regular chalk paint, the homemade version will thicken as it sits, so just add more water as needed. Have fun and experiment!

---

It seems to me that both milk paint and chalk paint require waxing to complete the finish.
So here is some info on that:


Shades of Amber shares how to use chalk paint (and wax).

and

Miss Mustard Seed has a great video tutorial = Waxes 101.

---


So now, about Milk Paint
 

image from Rusted Gingham

Martha Stewart shares a Milk Paint Recipe  -
the needed materials include lemon, skim milk, sieve, cheese cloth, paint powder or acrylic paint.

It sounds easy enough to create, but the milk kinda concerns me.  I just couldn't get used to the idea so quickly. 

-

Another recipe can be found at Earth Pigments -
with a few more ingredients or materials.

-

Miss Mustard Seed shares about Milk Paint Basics - no recipe, but she has her own line of Milk Paint (a powder you mix on your own) and a few other products that sound great.  She also has several milk paint tutorials to share.

Maybe someday I'll do something with milk paint, but for now, I'm sticking with chalk paint.


-----


Now a bit of FYI for your DIY, just because I found it in my search ... 

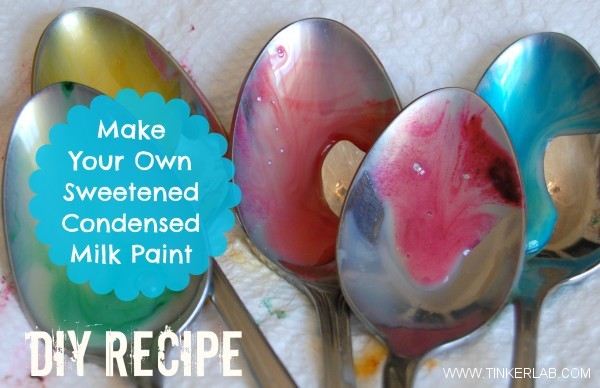
There is a milk paint that uses sweetened condensed milk.
Ya, really! 

The recipe can be found at Tinker Lab

I don't recommend it for your furniture ;)
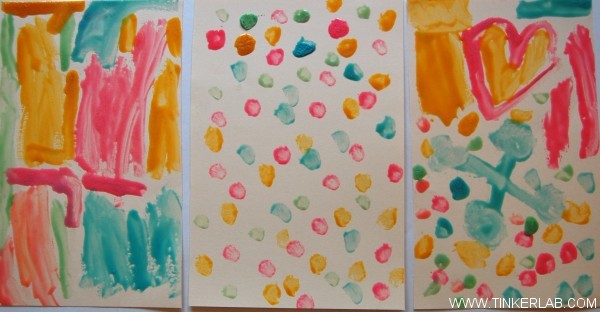
But, your kids might enjoy having some fun with it on paper.

It's for kids painting
(and eating if they desire)


 sweetened condensed milk paint diy from tinkerlab
how to make sweetened condensed milk paint


---

Well, there is so much info in this post that I decided not to add my projects completed with chalk paint.  I'm saving that for it's own post.  It's coming up next!


Thursday, August 29, 2013

A Tonka Truck and Some Spray Paint

I Love Tonka Trucks!


Our boys pushed these big trucks around during a lot of their play time when they were younger. They don't look so great anymore, but I can't get rid of them.

 
Maybe someday I'll figure out a great place for them, but for now they wait patiently.
 
I wanted to give our granddaughter a dump truck this year, and really wanted a pink Tonka truck for her, but Tonka doesn't make a pink one.


Years ago they made this pink Tonka truck that now rests above the window in our office, having once belonged to someone in our family when he was a young child many, many years ago.  This is definitely Vintage!  ;)


I think this is a cool truck, but I wanted a big pink dump truck.
So ...,
 
I repurposed a yellow truck -

this


became this
 
 
pink, with a bit of purple!
 
Now hers won't get confused with her brothers.
 
The trickiest part was deciding where and how to paint it. It's pretty tricky to get around all those tight places.
 
My mind thought I could paint the bottom of the bucket purple and the inside pink.  Then I looked at the truck.
I couldn't find a good start and finish point for the two colors to meet up.
 
So ...,
 
I did the next best ..., easiest thing!


Spray paint worked fast and easy and this truck is ready for our little sweetie to push it around. 
 
Maybe we'll find jewels, food, or a doll getting a ride in it someday. 
Maybe my granddaughter will even get a ride in it!
 
It can happen!
It has many times before with gramma's dump truck.


Now, just as a side note - I googled pink Tonka dump trucks and found a bit of info - somebody out their might paint one for you.  


And another side note - I just saw this and had to come back and post about it  here, since this is about dump trucks -

Product Details
image found on amazon

I saw this in the window of the John Deere equipment store in a nearby town (Quincy) and decided that's what I want for Christmas! (The truck I saw in the window looked less plastic than this one, and really cool.)

I didn't go into the store, but I did tell Santa when he came out of the store.  Ya, but I don't think I'm gonna get it. 
 
And it has nothing to do with whether I've been bad or good!


Saturday, August 17, 2013

Paint a Wall


This in an interesting idea, but would work best if there was crown molding at the ceiling to cover up the corner that the roller won't get.  More info here.


Tuesday, July 23, 2013

Painting Fabric Furniture

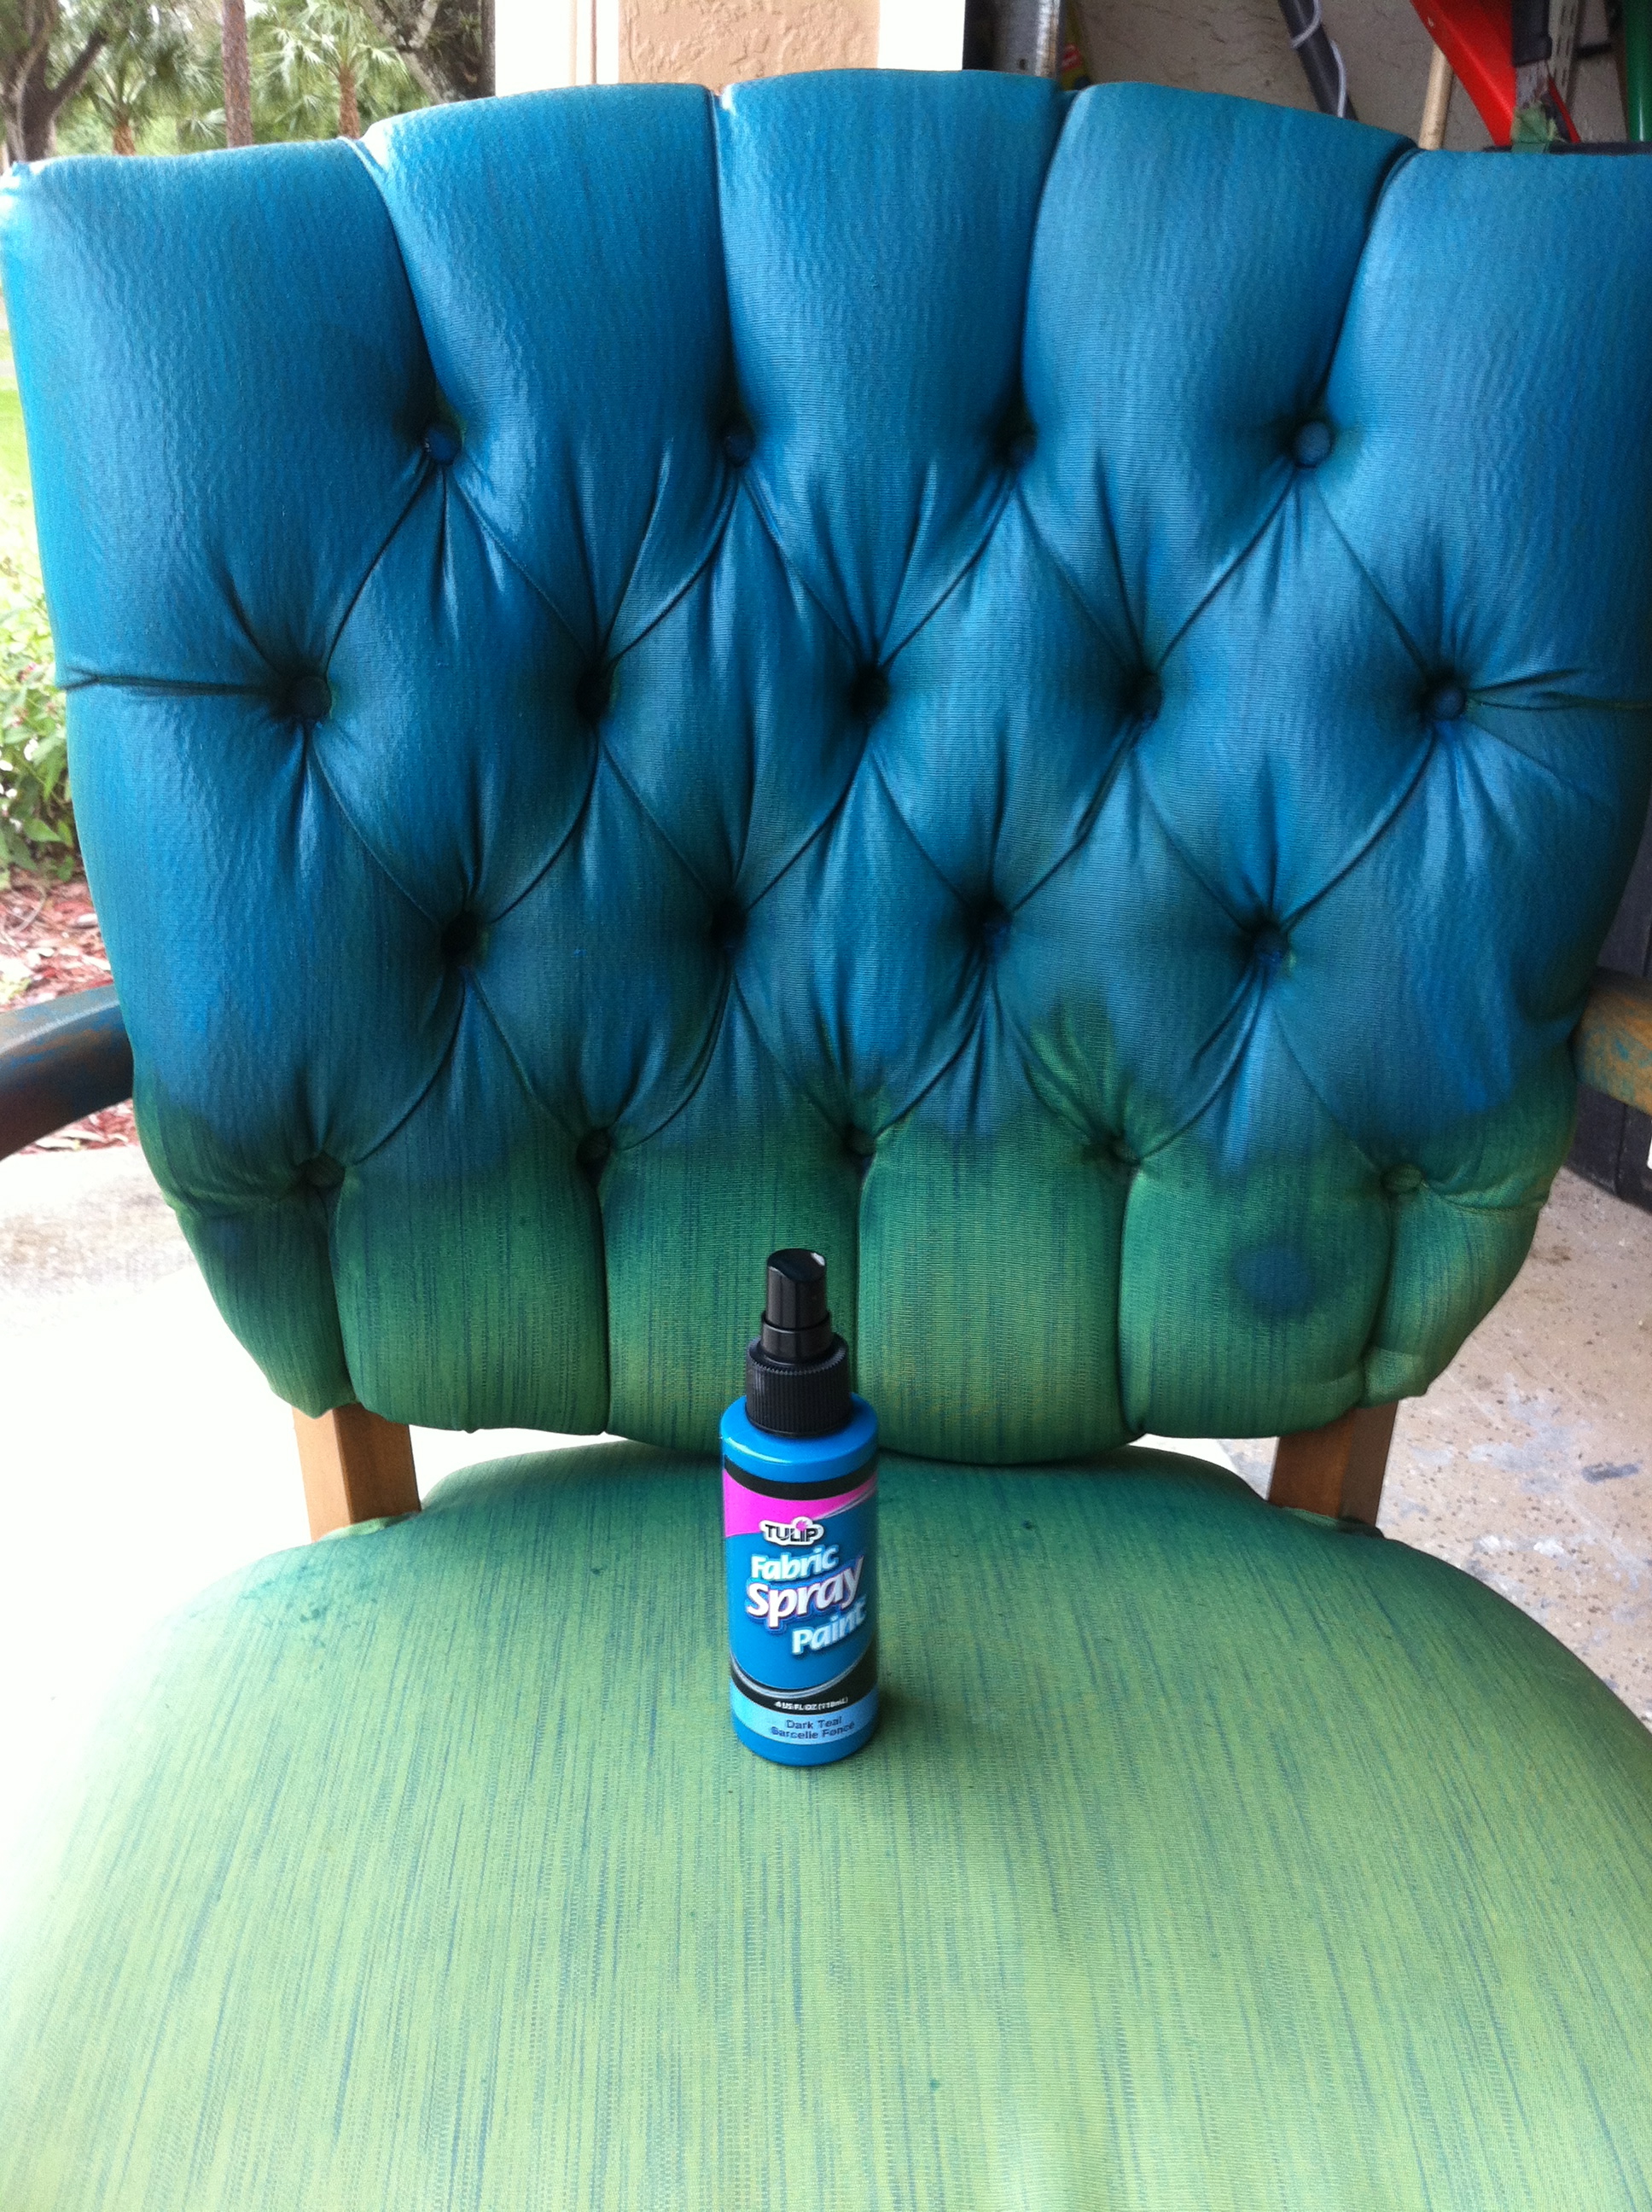
Have you tried painting fabric furniture?
 
Tulip Fabric Spray Paint

It looks like a great idea for this chair.
From Pinterist Addict, with a follow-up post too.


Thursday, July 18, 2013

My Mainbath Redo - part 2 - Color

What colors to use?

We are keeping the gray countertop and tiles and the flooring will remain (it is white with gray lines).

We will be painting walls and cupboards and other furniture pieces.  Looking for fun, but relaxing color.

We were thinking blues -
So here are some blues and grays from The Creativity Exchange

And these from Favorite Paint Colors
 This aqua or turquoise blue/green from Sand & Sisal is beautiful and calming, yet happy  - a look we really like. 


We have made a bit of a change in our thinking, and
we are now thinking lavender...
with some accent colors ...

Here is a lovely lavender wall from Colormatch


--

decor8 shows these two rooms - the room on the left has the lavender walls and the blue rug - lavender and blue ..., that appeals to me.


--

I don't care for the bright yellow in this next picture, but I like the other two colors together.


--

Here is a lovely lavender wall from Apartment Therapy 
I like the additional colors here - though the brown surprises me.  I also need a bit more dusty or distressed green for the look I'm hoping to create.


--

This next room is a lovely combo from homedit.   I almost need to redo a bedroom to match this look.  We love it!  We just don't have a room that would look as lovely as this.

I like the back wall looking a bit beige - it seems to help calm the colors in the room and make it warm and inviting.
The color of the wall behind the door helps me see how a green piece of furniture would look against the wall,
 and the blue-ish throw on the chaise can help give an idea of a blue piece of furniture with this color combo.
The dark purple color in the pillows adds a lovely touch too.
The whites are a must!


--

Though it is too dark for what I am wanting, I like this wall with the texture or aged look, and the combination of colors from other things create a rustic and interesting look.


--

My Interior Inspirations shares this lavender room.
This lavender seems a little light, and the green luv seat seems a little dark, but I like the green wooden chairs, and of course, the white furniture. 


--

I love this shower curtain from Zillow
and the deeper purple frame on the mirror is awesome.


--


 A lavender or purple and green, and blue from The Decorologist
This includes black, but I think I like white a bit better for our smaller room.


While we are at it, look at this color combo (from the above site)


 Well, we've got some work to do.

Related Posts Plugin for WordPress, Blogger...